Now presentation documents are using everywhere to explain any topic in more interesting and attractive way. Presentational task is now mandatory for educational or any type of business purposes. Students, teachers and office workers need to create and use presentation in regular basis. Microsoft Power Point is very popular software for creating presentation file. You can create any type of presentation document by applying many features of this software. A well prepared presentation will help to keep audience attention, when a presenter tries to explain any topic or present any information. So it is necessary to know how to create a good presentation file for educational, business or any other purposes. This article will help you learn how to create a presentation file from the basic level using Power Point software.
Type Power in the search box to find PowerPoint application. Click on PowerPoint 2013 to open the software.

To create a new presentation file, click on Blank Presentation.

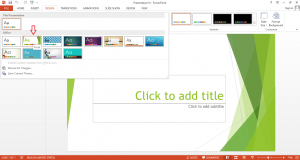
If you want to use any theme as background for your presentation file then click on DESIGN tab. Click more button to open default theme list. If you select the Facet theme then the following theme will appear in the background.
Any presentation file is divided into many slides. The first slide of the presentation file is created now. Normally, the presentation title and subtitle contain in the first slide. So click on the title and subtitle box and type the content related to your presentation file.

Right click on the slide thumbnail in the left side and select New Slide from the pop-up menu to create a new slide.

Now a new slide is created with default layout that contains a title and content area. There are six icons in the content area to add any table, chart, graphics, local image, on-line image and video. The use of these icons will be explained in other articles. Now, how you can use list items or bullets in your presentation is shown in this article.

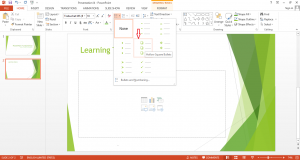
Click on the content area and select Hollow Square Bullets from the bullet group.
Now add your list items one by one.

If you want to create sub items under any first level item then press enter after the main item and press tab to add new sub item in the second level. You can use the default bullet for sub items or change from the bullet group.

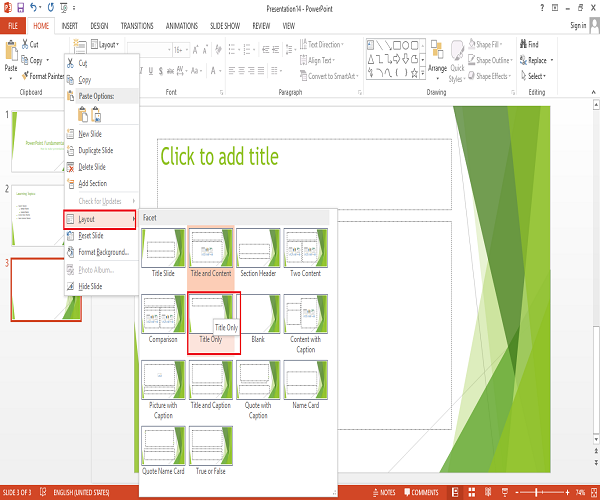
Again add another new slide. You can change the default layout of any new slide by right clicking on new slide and selecting Layout option from the pop-up menu. There are many layouts are available. Title only is selected here.

In this way, you can add many slides with different layout based on your document requirements and add your contents. When all slide designs are completed then save your document. Now, you need to show the preview of your presentation file. You can show the preview by two ways. When you press F5 then the slide will be displayed as full screen and you need to use arrow keys to move slide from one to another. If you press Alt+F5 then the slide will be displayed as the following image. There is an option in PowerPoint to forward the slides automatically which will discuss in PowerPoint animation article.

You can show the above steps in the following video tutorial.