Table design is very important part for any document. In MS word, you can easily organize your tabular data of the document by adding table. You can apply different type of style format in the table to change the looks of your table and make it more readable and attractive. If you want, you can also create your own table template by using any existing table template of word. In this article, you will learn how to create table based on your requirement, apply styles and create your own table template.
Suppose, you have to create a table like the following image:

Add Table:
There are 5 rows and 6 columns in the above table. Go to the Insert tab and create a table with 5 rows and 6 columns.

Merge table cell:
According to the image, three cells of the first row and last two cell of the first column of the table will require to merge.

Select the cells that you want to merge and right click to merge the cells by selecting Merge Cells menu option. Merge all other cells by following same steps.

After merge, the table will look like the following image.

Now select all cells and centralize the cell data.

Add the contents based on the data.
Format Cell Color:
Select cells and fill color.

Set the fill color of the others cell in the same way. After setting color your table will look like the following image and the table design will complete.

Apply table style:
Select the table and click on the design tab to apply default table style.

Click on the more button and select Medium shading 2 –Accent 1 style for the table.

After applying the style table will be look like the following image. In this way you can apply any default table style for your table.

Create your own table style:
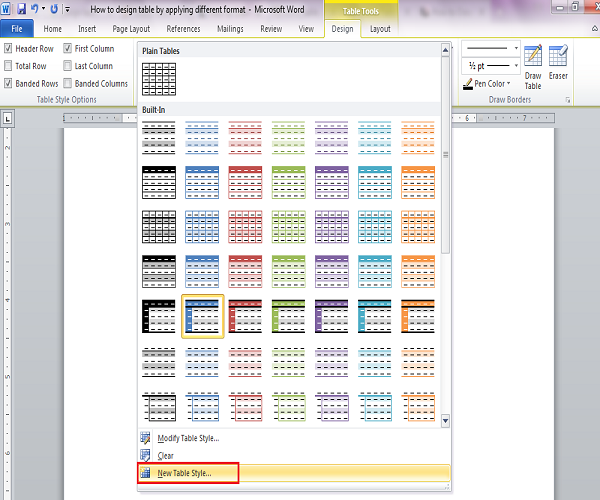
If you are not satisfied with the default table style of the word document and want to create your own table style then you can do it by using New Table Style option. Select the table and click on the Design tab. Click on more button and select the option New Table Style.

Now you can design the new table style by setting the value of the following dialog box. First, type the name of your new style. Here My New Style is set. Select style and format from the drop down list. You can also select font type, color and size from this dialog box. You can choose option to apply this style only in the current document or new document. Click OK button.

After creating new style, you can use your newly created style in any table.

Apply your new style in your current table and your table will be looked like the following image.

By following above steps you can easily organize your table data based on your needs.
You can show the full steps from the following video: